Working with Files and Directories
Creating Directories
The command to create new directories (also called folders) is mkdir. For example, to create a directory called books inside your home directory, you would issue the following command:mkdir books
Renaming Files
In Linux, renaming a file is done via the mv command, which stands for 'move'. The general format of the command is:mv SOURCE DESTINATION
So, if for example you would like to rename the directory created previously, books to mybooks2, you would issue
the following command:
mv books mybooks2
Copying Files
The command for copying files and directories is cp. For example, to copy the file /etc/network/interfaces to you home directory you could write the following:cp /etc/network/interfaces /home/USER
Make sure to replace USER with your username. Or, if we keep in mind that ~ is automatically expanded into
the home directory of the current user:
cp /etc/network/interfaces ~
And if your current working directory is already your home directory (e.g. /home/USER):
cp /etc/network/interfaces .
The character . expands into the current directory. See the first chapter to see more details on this. You could even
use environment variables, which expand into a certain string. In the following example, the variable $HOME holds the path
to your home directory:
cp /etc/network/interfaces $HOME
You may have noticed that if you copy a file to a path that ends in a directory (e.g. /home/USER), the
file will be copied inside the respective directory, it will not delete nor replace it.
You can copy more than one file at a time, the last argument being the directory where you want the files to be copied:
cp myfile1 myfile2 myfile3 ~/books
This command will copy myfile1, myfile2 and myfile3 from the current working directory into the books folder, located
inside your home path.
Copying Directories
Directories can be copied in the same fashion as files, only this time we will use the -r switch. This tells the cp command to copy directories recursively, meaning all the sub-folders and files of the specified directory.cp -r Documents ~/books
This command will copy the Documents folder from the current directory inside the books directory located
in your home path.
Creating Files
To create empty files, you can use the touch command. In a later chapter I will discuss on how to create and edit or modify text files with various editors.touch myfile
Removing Files
To delete a file, you would use the rm command:rm myfile
To delete a directory, you will also need the -r switch:
rm -r mybooks
Adding Users
Adding a New User
The command is adduser which is a user-friendly wrapper for the useradd command. More on administrating users and groups in a later chapter.Other Commands
View the Current Date and Time
Use the date command for displaying the date and time:$ date Thu Oct 2 16:32:58 EEST 2014
$ date +"%Y %b %d %H:%M:%S"
2014 Oct 02 16:58:44
sudo date +"%H%M" --set="1656"
The above command will change the hour and minute to 16:56.
Calendar
The cal command will display an ASCII calendar of the current month, and will highlight the current day: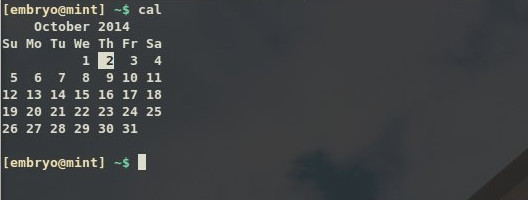
Show Your Username
The whoami command will print the username currently logged in. Additionally, you can use the echo $USER command, which will use the $USER environment variable to echo (print) its value:
Print System Information
For this we will use the uname command with the -a switch, to show all the information available:$ uname -a Linux mint 3.13.0-24-generic #47-Ubuntu SMP Fri May 2 23:31:42 UTC 2014 i686 i686 i686 GNU/Linux
$ inxi
CPU~Dual core Intel Celeron CPU G530 (-MCP-) clocked at 1600.000 Mhz Kernel~3.13.0-24-generic i686 Up~2 days Mem~824.3/3721.2MB HDD~500.1GB(68.9% used) Procs~189 Client~Shell inxi~1.8.4
Show Uptime
The uptime command is used to print for how long the system has been running:$ uptime 17:21:25 up 2 days, 21:02, 7 users, load average: 0.28, 0.21, 0.21
Print Text
The echo command is used to output text:$ echo "Hello, world!" Hello, world!
$ echo -e "Hello,\t world\!\n\n"
Hello,   world\!
Searching for Commands
Commands and programs usually reside inside the /bin, /sbin and /usr/bin directories. To search for a command in such standard locations, use whereis:$ whereis cal cal: /usr/bin/cal /usr/bin/X11/cal /usr/share/man/man1/cal.1.gz
$ which cfgr.sh
/floydb/debconf/scripts/cfgr.sh
Environment variables such as $HOME, $USER or $PATH are variables which will be expanded (replaced)
by the shell with the string that they hold. For example, the $PATH variable contains all the locations in which
commands reside, separated by the : character. Try echo $PATH to see it.
Show File Types
Use the type command for this:$ file track01.ogg track01.ogg: Ogg data, Vorbis audio, stereo, 44100 Hz, ~192000 bps, created by: Xiph.Org libVorbis I (1.1.0 RC1) $ file cover.png cover.png: PNG image data, 320 x 317, 8-bit/color RGBA, non-interlaced
Getting Help
Usually commands have a manual page, so for any command you could use man COMMAND to read a detailed help about what it does and how to use it. The manual page lists all the parameters you can pass to the command. Once you've opened a manual page, you can navigate through it via the arrows, Ctrl+P or Ctrl+N to read the previous and respectively, next line, or Q to quit and close the manual page and return to the shell.Commands usually have a -h or --help parameter, which will display a short description on what the command does and a compact list of parameters that it takes.
More on getting help in a following chapter.