This guide contains information on how to install and configure Urban Terror, how to start a dedicated server, as well as an overview of the features and the gameplay it provides.
Note: The resources section has some links to several comprehensive guides to Urban Terror, so make sure to check it out too.
Note: There is a new game in the works, called Urban Terror HD. This will be a completely new game which will no longer use the ioQuake3 engine.
Table of Contents
- Installing Urban Terror
- Overview
- Configuring Urban Terror
- How to Start a Dedicated Server
- Screenshots
- Resources
Installing Urban Terror
I will show two ways of installing: one by downloading the whole package which includes everything the game needs to
run, and the second method by using the Urban Terror updater, which automatically fetches the game files.
Download the Complete Package
You can download the complete archive from the official homepage
(direct link),
and then uncompress it to a location of your choice. You can then run the Urban Terror binary from that directory.
Install Using the Urban Terror Updater
This method makes use of the Urban Terror Updater, which will download and install the game automatically for you.
First, download the updater from
here, uncompress it
and run the updater binary from that directory.Once you have the game installed, just run the updater from time to time to ensure it downloads and installs the latest bug fixes and changes.
Overview
Urban Terror is a fast-paced first-person shooter taking place over various urban environments, including
an online multi-player mode, various maps, weapons and game mods. It's highly configurable and has a somewhat
different gameplaying style. Nickname authentication is also possible.One of the power features of Urban Terror are the trickjumps, dodging off walls, healing yourself or other wounded teamates and the stamina bar. The stamina bar allows you to only run or jump for a limited period of time, and the more wounded you are, the less stamina you will have.
Maps
There are around 40 maps which come by default with Urban Terror, and more are available to download online. Some of
the most popular include Abbey, Algiers, Casa, Kingdom, Mandolin, Prague, Turnpike and Uptown. Maps mostly resemble
urban environments, however there are some which take place in forest or jungle environments, like Mayan Standoff or
Raiders.Uptown
Weapons
There is a very wide range of weapons to choose from: AK47, LR-300, SR-8 for sniping enemies and so on. Pistols,
grenades and the usual knife are also available. You can choose to wear a helmet or equip your gun with a silencer.
Some weapons are more useful for short range, while others, like the SR-8 sniping rifle, can be used to scope and then
frag your enemies.
Teams
There are two different teams in Urban Terror, generically called the "Red Team" and the "Blue Team", wearing uniforms
accordingly colored. However the servers can specify the names to be used for the teams.
Game Modes
Urban Terror 4.2 comes with no less than 9 game modes, including the usual ones: Free for All (FFA), Team Deathmatch (TDM),
Capture the Flag (CTF). Besides these, there are several more: Team Survivor (TS), Follow the Leader,
Capture and Hold, Bomb, Jump and Last Man Standing.
- Free for All (FFA) - this mode is a deathmatch without teams, everyone is by himself and you get frags from killing any opponent
- Team Deathmatch (TDM) - there are two teams fighting each other until all the players in one team die; servers may configure a continuous respawn, without having to wait for everyone to die, so in this case the team with most frags in the end wins
- Capture the Flag (CTF) - there are two teams and each team is trying to steal a flag and bring it back to the own flag; the team with the most flags captured at the end wins
Trickjumps and Other Features
One of the great features in Urban Terror is the ability to run and dodge of walls. This is also capped by the amount
of health you have and your stamina bar, which decreases when you run or jump, so in order to replenish it you will
have to walk or rest for a while. There are dedicated servers with maps created only for trickjumping, where you have
to reach a certain point to win. There are also very skilled players performing these trickjumps, which require
quite some time before mastering them. The official website has some nice videos of these.Once wounded you can heal yourself, and you can also heal your teamates. This is called "bandage" in Urban Terror.
One of the big pluses Urban Terror has is that is actively maintained and the official homepage provides new videos and updates regarding the progress made in Urban Terror 4.2 and Urban Terror HD, the upcoming game from FrozenSand. A while ago there was also a Questions & Answers live online chat meeting with the developers. Really great support from the team behind the game.
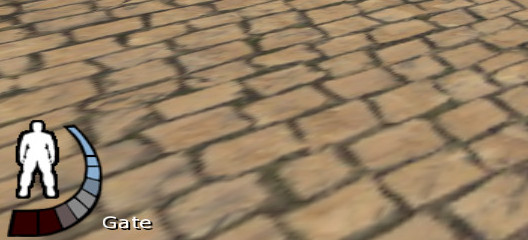
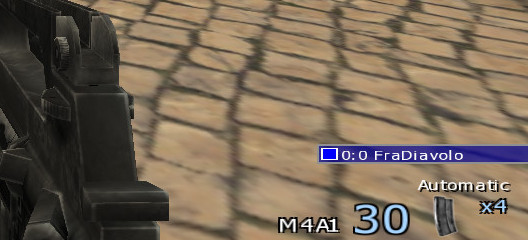
The HUD
Starting from left to right, the default HUD displays:The health bar, which is blue when you have all your health and all your stamina. When the health bar is grey, you don't have stamina, while if part of your health bar is red you're wonded.
In the screenshot below, the player has approximately 40% stamina and 80% health (you can see he is wounded because the first two sections of the bar are colored red).
Configuring Urban Terror
Note: Since Urban Terror is using the ioQuake3 engine, configuration is very similar to configuring ioQuake3.
Here is a guide which explains how to configure ioQuake3, and most of it applies
to Urban Terror too.I will only explain how to configure Urban Terror using config files. As with any ioQuake3-based games, configuration can be done via text config files, and in our case the config files will be located inside the $HOME/.q3a/q3ut4/ directory. You can create a text file here called autoexec.cfg, and all the commands inside it will be ran automatically when the game starts. You can create additional .cfg files in this directory and manually run them in the game console using /exec file.cfg. Or you can create additional .cfg files and then put commands inside autoexec.cfg to run them.
Example of autoexec.cfg file:
name "MyNickname"
exec "settings.cfg"
seta sensitivity "9"
seta r_gamma "4"
To add custom options, you will add them in the form of seta variable "value". For example, to show the current FPS, you would add the following line inside your autoexec.cfg file:
seta cg_drawFPS "1"
You can configure CVARs using the seta command (e.g. seta cg_fov 110) and bind keyboard shortcuts
using the bind command (e.g. bind v "ut_weaptoggle knife").
Default Keyboard Binds
- 1 - knife
- 2 - sidearm
- 3 - grenade
- 4 - secondary submachine gun
- 5 - primary submachine gun
- W - forward
- A - move left
- S - back
- D - move right
- R - reload
- Q - bandage
Bind Commands
This is a list of available weapon binds. Use bind KEY weapon inside your autoexec.cfg to configure them.
- ut_weaptoggle knife
- ut_weaptoggle sidearm
- ut_weaptoggle grenade
- ut_weaptoggle secondary
- ut_weaptoggle primary
- +button5 (reload)
- +button6 (bandage)
- +button7 (defuse/doors)
- +button8 (sprint)
Example of autoexec.cfg File
This is my autoexec.cfg file, rather simple but still enough for my needs. There are comments throughout
the file explaining what certain commands do:
seta name "New_UrT_Player"

bind e "+forward"
bind s "+moveleft"
bind d "+back"
bind f "+moveright"
bind SHIFT "+movedown"
bind SPACE "+moveup"
bind z "+speed"

bind t "+button5" // reload
bind q "+button6" // bandage
bind r "+button7" // defuse/doors
bind a "+button8" // sprint

bind v "ut_weaptoggle knife"
bind w "ut_weaptoggle sidearm; ut_weaptoggle secondary"
bind MOUSE4 "ut_weaptoggle grenade"
bind MOUSE5 "ut_weaptoggle sidearm"
bind g "ut_weaptoggle primary"
bind h "ut_itemuse"

//set zoom0 "ut_zoomin; bind MOUSE2 vstr zoom1"
//set zoom1 "ut_zoomin; ut_zoomin; ut_zoomin; bind MOUSE2 vstr zoom0"
//bind MOUSE2 "vstr zoom0"

bind y "messagemode"
bind u "messagemode2"
bind i "messagemode3"
bind b "ui_radio"

bind l "ui_selectgear"
bind k "ui_selectteam"

bind F9 "exec autoexec.cfg"

seta sensitivity 7

seta com_maxfps "60"
seta com_blood "0"

seta s_volume "0.48"
seta s_musicvolume "0.0"

seta cg_fov "100"
seta cg_gunsize "1" // smaller gun
seta cg_showbullethits "0" // no hit info
seta cg_hitsound "1"
seta cg_drawcrosshair "2"
seta cg_crosshairsize "15"

seta cl_autodownload "1"

seta r_mode "-1"
seta r_customwidth "1366"
seta r_customheight "768"
seta r_fullscreen "1"
seta r_finish "1" // sync every frame
seta r_gamma "1.2" // default: 1

bind KP_DEL "ut_radio 9 4"
bind KP_INS "ut_radio 3 3"
bind KP_ENTER "ut_radio 9 9"

bind KP_ENTER "ut_radio 3 3"
bind KP_DEL "ut_radio 9 9"

// cycle through sensitivity
set sens0 "seta sensitivity 5.8; set switch_sens vstr sens1; echo sensitivity 5.8"
set sens1 "seta sensitivity 7.0; set switch_sens vstr sens2; echo sensitivity 7.0"
set sens2 "seta sensitivity 9.0; set switch_sens vstr sens0; echo sensitivity 9.0"
set switch_sens "vstr sens0"
bind p "vstr switch_sens"

// cycle through com_maxfps 43, 60
set fps43 "seta com_maxfps 43; set switch_fps vstr fps60; echo com_maxfps 43"
set fps60 "seta com_maxfps 60; set switch_fps vstr fps43; echo com_maxfps 60"
set switch_fps "vstr fps43"
bind o "vstr switch_fps"

echo "Loaded autoexec.cfg"
Here is a nice script for SR-8. This will zoom in once showing the scope when you press MOUSE2 (right mouse button), and will keep the scope for as long as you keep pressing MOUSE2. Once you release it, the zoom will be back to normal. Very useful for sniping with the SR-8.
set scope0 "ut_zoomin"
set scope1 "ut_zoomreset"
bind MOUSE2 "+vstr scope0 scope1"
Starting a Dedicated Urban Terror Server
To start a dedicated server you will first need to set up the server config file (for this example it is called
server.cfg) and the map cycle file (called mapcycle.txt), then you will have to run the dedicated server
binary with several arguments. This section will explain how to create these files and how to start your
dedicated server.So, here are the main three things:
- Server configuration file, for example server.cfg
- Map cycle file, for example mapcycle.txt
- Dedicated binary running in command-line with several arguments
Quake3-UrT-Ded.i386 +set dedicated "2" +set net_port "27960" +set fs_game "q3ut4" +exec "server.cfg"
Quake3-UrT-Ded.i386 - the name of the server binary
+set dedicated "2" - make the server dedicated
+set net_port "27960" - choose the port on which the server will listen for connections
+set fs_game "q3ut4" - the type of game to start; this should always be q3ut4
+exec "server.cfg" - specify the server configuration file
Server Configuration File
This is an example of the server configuration file, server.cfg:
set sv_hostname "My UrT Server | TDM"
set g_motd "Welcome to my UrT server!"
set sv_joinmessage "Welcome to my UrT server! - TDM -"

set sv_maxclients "14"
set sv_pure "1"
set sv_privateclients "2"
set sv_privatepassword "makeroom"

set timelimit "20"
set fraglimit "100"
set capturelimit "10"

set g_gametype "3" // 0 - FFA, 3 - TDM, 4 - TS, 5 - FTL, 6 - CAH, 7 - CTF, 8 - BM
set g_teamnamered "Sabbathians"
set g_teamnameblue "Floydians"
set g_warmup "4"
set g_friendlyfire "1"
set g_maxteamkills "5"
set g_waverespawns "0"
set g_respawndelay "4"
set g_forcerespawn "4"
set g_bluewave "8"
set g_redwave "8"
set g_deadchat "2" // 0 - living players cannot see dead chat, 1 - only teammate dead chat, 2 - all dead chat
set g_allowchat "2" // 2 - all chats
set g_allowVote "536875743"
set g_gear "0" // allow all weapons

set sv_master1 ""
set sv_master2 "master.urbanterror.info"
set sv_master3 "master2.urbanterror.info"
set sv_master4 "master.quake3arena.com"
set sv_master5 "master1.qtracker.com"

set g_mapcycle "mapcycle.txt"
map ut4_uptown

set rconpassword "REPLACE_THIS_WITH_YOUR_RCON_PASSWORD"
The Map Cycle File
And now, the mapcycle.txt file which specifies which maps should be played on the server:
ut4_uptown
ut4_turnpike
ut4_abbey
ut4_dust2_v2
ut4_algiers
ut4_casa
ut4_kingdom
ut4_prague
ut4_mandolin
ut4_austria
ut4_riyadh
ut4_tunis
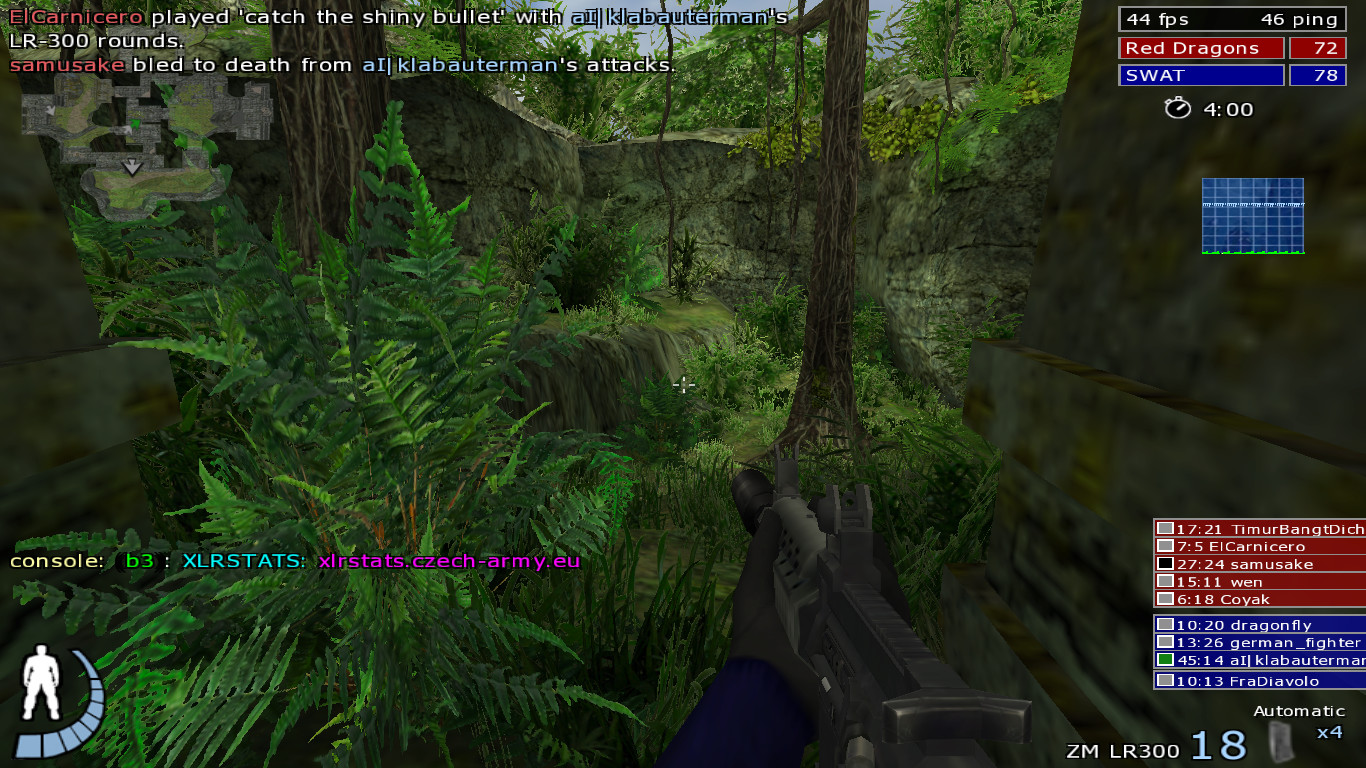
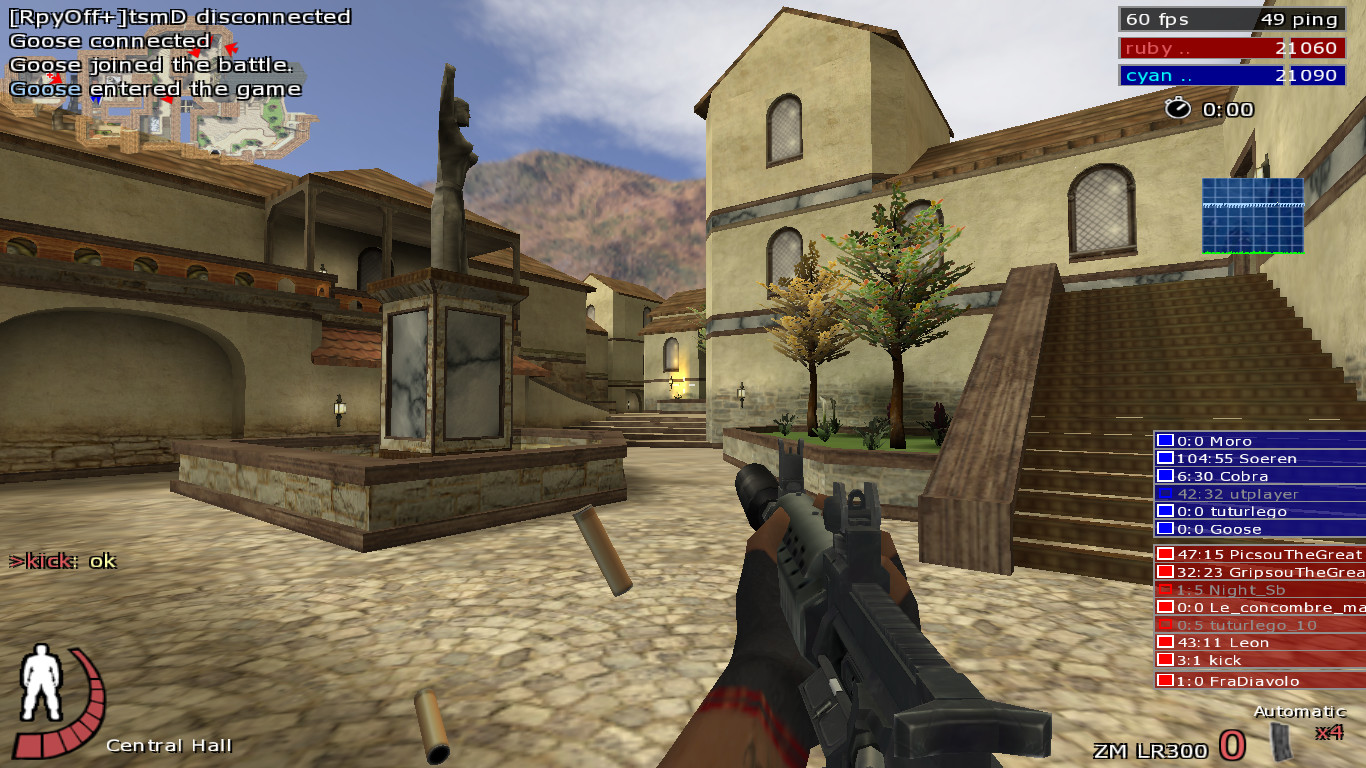
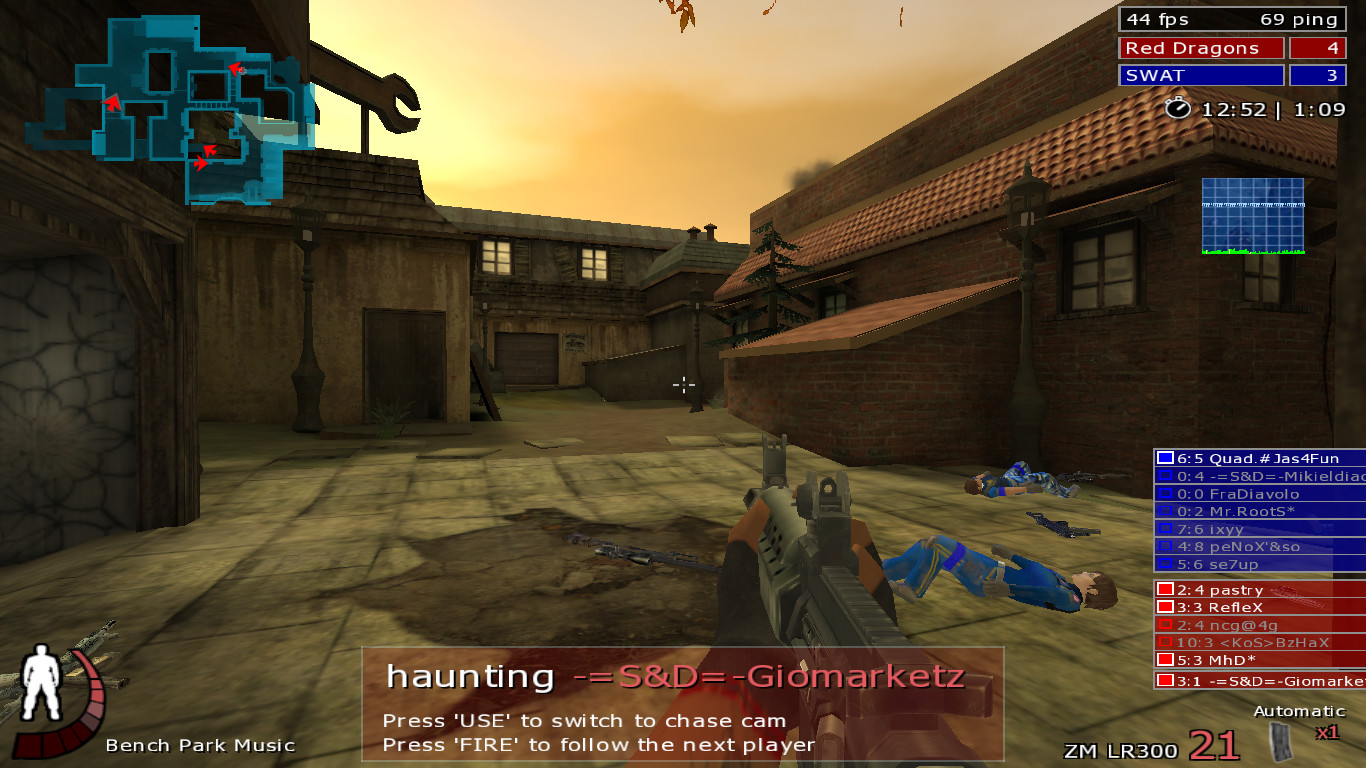
Screenshots
Abbey
Resources
Official
Urban Terror Resources & Guides